Part 2: Build and run the container.
In my previous post, we learned basics of the docker and some of the useful commands that we would be using throughout the series. In a continuation of my last post, we’ll cover the below topics:
- Build your first docker image
- Container lifecycle
- Spin your first container
excerpt out-of-excerpt
Build your first docker image
The image is built using “Dockerfile”. A “Dockerfile” is just a regular file which is understood by docker engine and process based on the instructions specified in the file. The “Dockerfile” has a series of instructions which is send to the docker engine for processing and as an outcome, this would generate a custom image for us. Think of the image as a template which is used to spin the containers.
The following commands are used with the docker file:
- FROM: To pull the base image from docker hub.
- RUN: Execute any command. This is used to do any customization i.e. pulling any framework from the web and install or run any in-build command. You can specify the PowerShell commands. This will create a new layer and execute at build time
- CMD: Execute any executable with a parameter. The parameters are passed in a JSON format. This will not execute at build time but when container start.
- EXPOSE: This will expose the container network port at runtime. The port can be exposed either on tcp or udp.
- ENV: To set the environment variable.
- ADD: copy files/folders/remote files to the container. This will create a new layer.
- COPY: copy files/folder to the container.
- ENTRTPOINT: Set an entry point of the program, you wish to run inside the container.
- VOLUME: Use to mount the host disk in the container.
- USER: Set the user to execute the commands i.e. RUN, CMD, ENTRYPOINT under its context. But before using this command, need to create the user.
- WORKDIR: Set the working directory.
- ONBUILD: Use when the image of one is used as a base for another. This is mainly used for the multi-stage build.
- LABEL: Bake the custom label in the image metadata. This is used to a apply the filter i.e. placement of certain types of containers like OS.
There are different variations of the commands which you can refer from https://docs.docker.com/engine/reference/builder/
Let’s create the “DockerFile”.
First, clone the tryout app (.net core) from the git repo. https://github.com/rahul24/Tech-O-articles/tree/master/TryOut/Part%202/Docker.Tryout
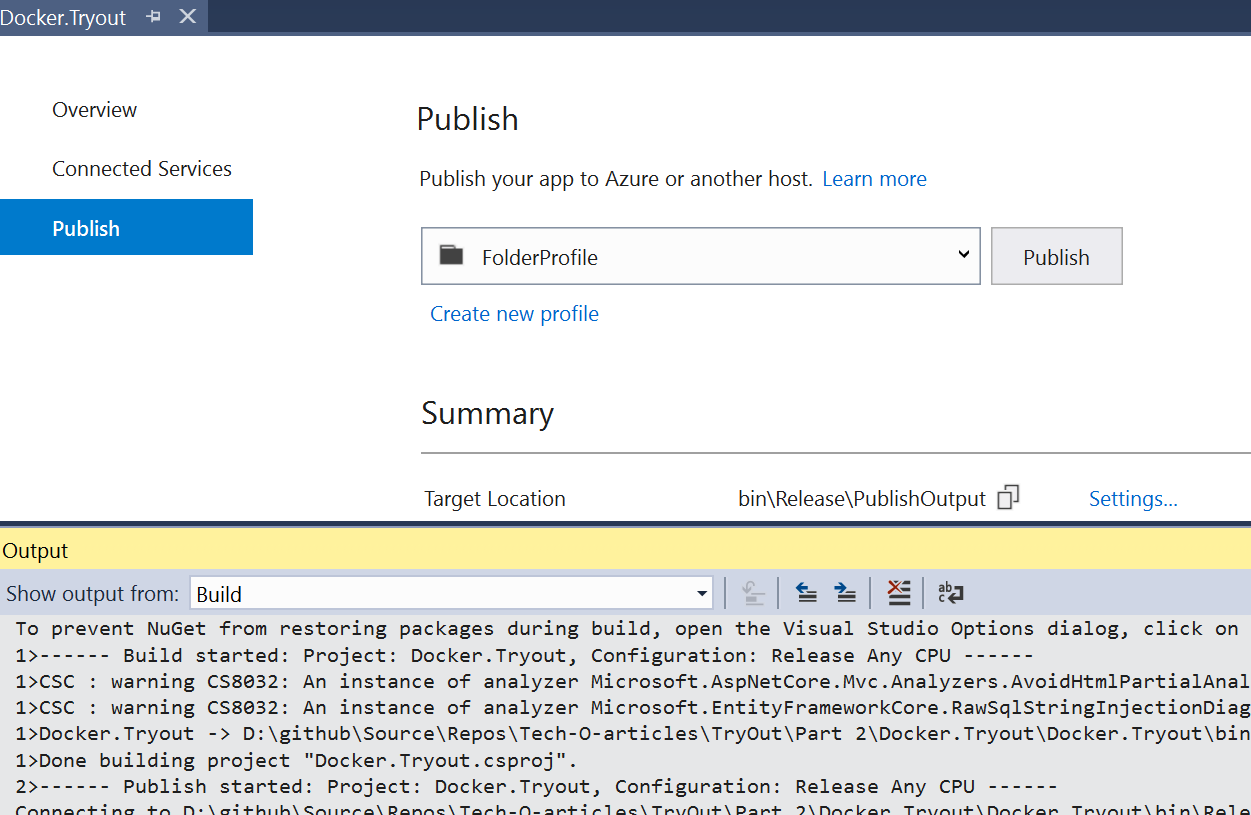
Open the project in visual studio and publish it.

Copy the “Dockerfile” from solution folder to the publish folder.
Now, will write the Dockerfile with commands which we learned above. As I specified, it has series of instructions which will create a set of layers. These layers are decoupled from each other.
Command
FROM microsoft/aspnetcore:2.1-aspnetcore-runtime
This will pull the image from the docker hub. Here we are pulling the specfic image which has Tag “2.1-aspnetcore-runtime”. If the image does not exist locally then gets pulled from docker hub.
Command
WORKDIR /app
Setting the working directory path.
Command
ADD . /app
This will copy all the files and folder from the current directory to folder “App” in the container.
Command
EXPOSE 80/tcp
Expose the container port on tcp channel at runtime. This will channelize the inbound/outbound host requests.
Command
ENV ASPNETCORE_URLS http://*:80
Set the environment variables where the service would listen for any incoming requests inside the container (Port 80).
Command

ENTRYPOINT ["dotnet","Docker.Tryout.dll"]
This will set the entry point of the program. Since this is a dot-net core app therefore using “Dotnet” shell with parameter – “Assembly Name (Docker.Tryout.dll)” which has a main method.
Posting the full version of the “Dockerfile” here:
From microsoft/dotnet:2.1-aspnetcore-runtime
WORKDIR /app
ADD . /app
EXPOSE 80/tcp
ENV ASPNETCORE_URLS http://*:80
ENTRYPOINT ["dotnet"," Docker.Tryout.dll"]
The last step of this section is to build the image using the “Dockerfile” which we just have created.
Command
Docker build -t <your docker account name>/<image name> .

e.g.:
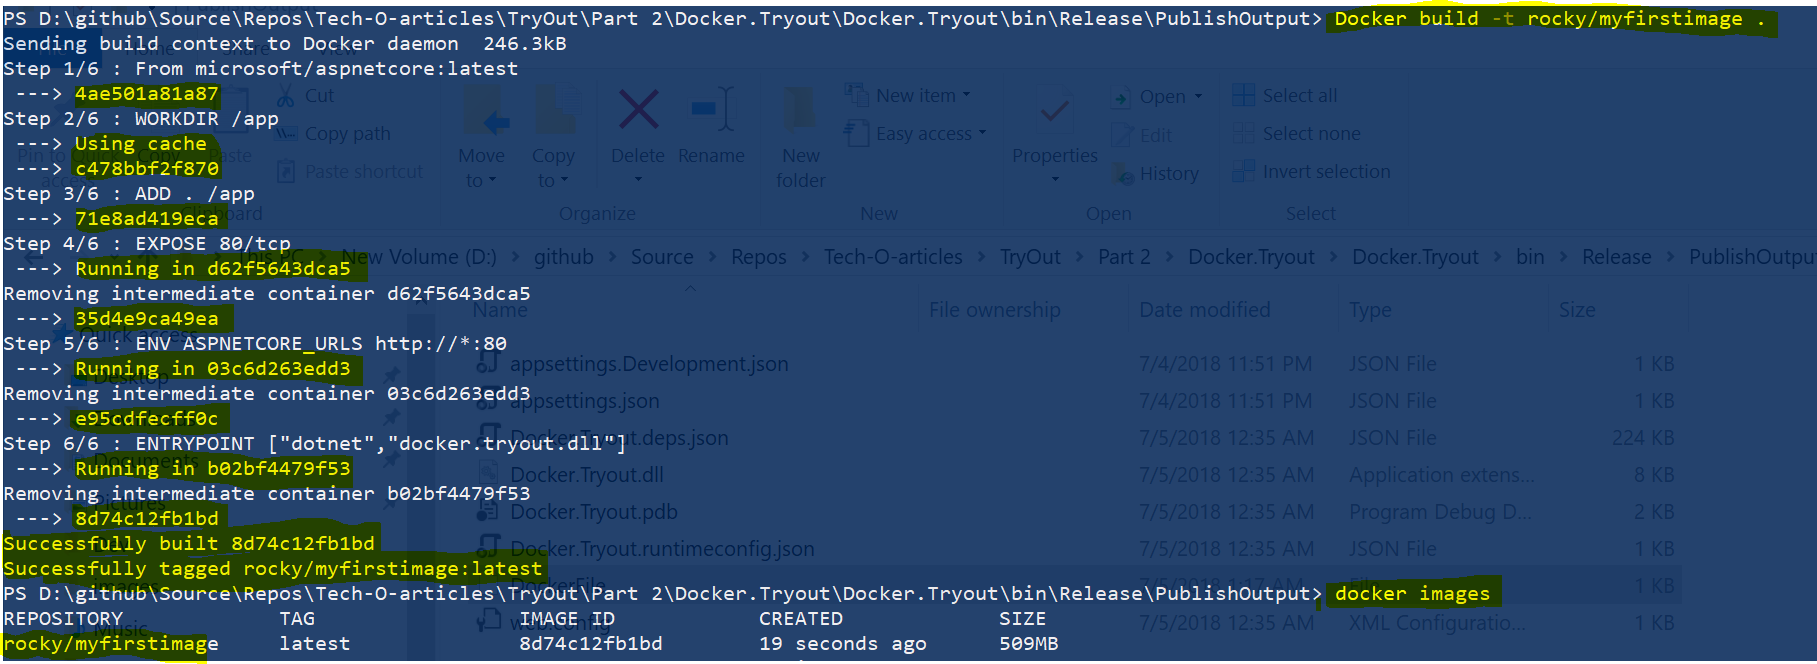
Docker build -t rocky/myfirstimage .
Output:

I’ve marked (highlighted by yellow) the specific things on the above image (output image). Since I already have an image complied with the same name in my system so for few layers it refers to the cache. If you don’t want your build to refer layers from the cache then use (–no-cache) at the end of the command.
Container lifecycle
The container is like a virtual machine when comparing by states, it could start, stop, delete. Unlike virtual machines, the container doesn’t persist data inside. If you wish to persist the data then need to mount the volume of the host to do the same. Some of the commands which change the state of the container are:
- “Docker create” command creates a container but won’t run. Specify the –name parameter, which will create an alias on the container. This is help to refer the container by its name.
Command
Docker create -t -p <host port>:<container port> --name tryout <your image name>

e.g.:
Docker Create -t -p 80:80 –name tryout rocky/myfirstimage

- List all the containers:
Command
Docker container ls -a
- “Docker rename” command is used to change the name of the container.
Command
Docker rename <container name/id> <new name>

Container States
Images are immutable once it gets created then can’t make any changes in them. Think of the image as a class and containers as objects. You can create N number of containers using the same image. The container cannot hold the data forever once it gets destroyed all the data will also destroy with the container. If the data needs to be persist permanently then the external volume needs to be mount. Some of the important states of the container lifecycle are:
- “Container Start” - This command will start the container.
Command
Docker container start <container name/id>
- “Container Stop” - This command will stop the container.
Command
Docker container stop <container name/id>
- “Container remove” - This command will deallocate the container (Gone … fooosh).
Command
Docker Container rm <container name/id>
Spinning a new container is so simple and take just a few seconds. Unlike virtual machines, containers are fast and smaller in size and have a lot of benefits.
Spin your first container
The container can be directly run using “Docker run” command. Some of the important arguments of this command are:
- –name: Assign the name to the container.
- -p: Map the host port with container port for traffic to flow.
- -d: demon mode (background).
- -i: Interactive mode.
- -t: TTY session.
- Running container in a daemon mode (-d option).
Command
Docker run -d -t  -p 80:80 –name setout  <image name>


Running container in an interactive mode then use -i instead -d option. This will block the foreground thread and show the stdout stream of the program hosted inside the container. To exit from the foreground thread without exiting from the container then use – CTRL + P CTRL+ Q.
Command
Docker run -it  -p 80:80 –name setout <image name>

Summary
This post explains, how to build an image using the docker file. Learn about the commands, use commands in docker file and put together all to create a custom image. This also explains, how to spin the containers and manage them.